Tag - window tips

How to Turn off Autoplay of USB drives and CDs in Window 7

For me, it’s really annoying to have autoplay dialogue box appear every time I insert my USB drives or my CDs into my pc. I’m not a big fan of this feature, so I’ve never kept it on. Since it’s a bit different in appearance of window xp comparing to window 7, I decided to make this article up accompanied with a video tutorial. Hopefully, this article will help you:

Question: What is Autoplay Dialogue Box?

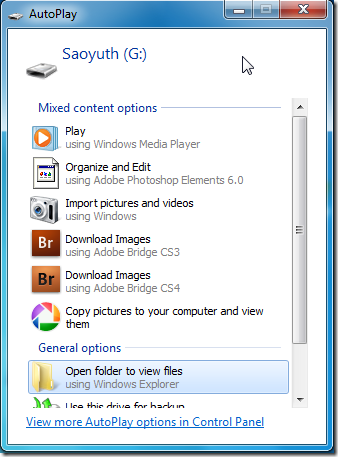
Answer: Autoplay Dialogue Box is a box appeared when you insert your USB drives or CDs into your computer. See the below picture:

2-23-2010 3-56-03 PM

Autoplay Dialogue Box

Question: Why should you turn Autoplay of USB drives and CDs off?

Answer:

  • It’s really annoying to have a box appear on your screen every time you insert your USB drives or CDs.
  • To prevent the autorun USB viruses infected to your computer.

Question: How to turn Autoplay of USB drives and CDs off?

Answer:

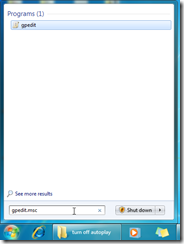
  1. Type “gpedit.msc” in the Start Search Box, and then press ENTER to open Local Group Policy Editor.
    2

    Type "gpedit.msc" in start search box

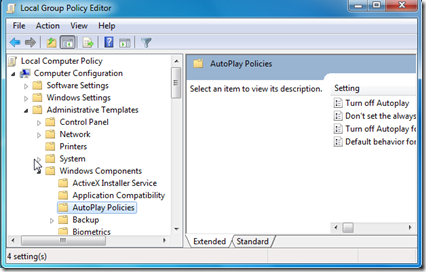
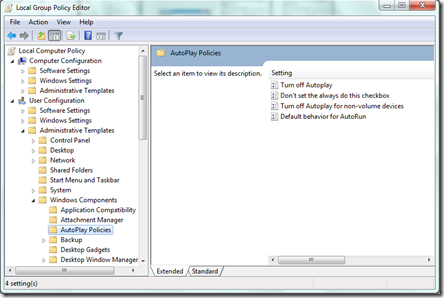
  2. Under Computer Configuration, expand Administrative Templates, expand Windows Components > click Autoplay Policies.
    3

    Local Group Policy Editor box

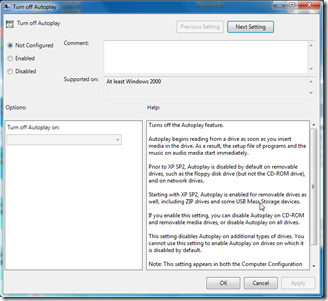
  3. In the right pane, double-click Turn off Autoplay to open the Properties box.
    4

    "Turn off Autoplay" box

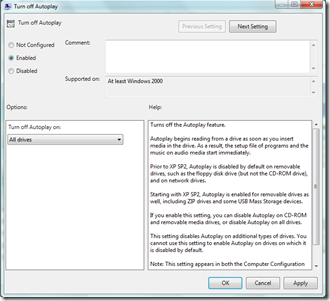
  4. Click Enabled, and then select All drives in the Turn off Autoplay on box to disable Autorun on all drives.
    5

    How to turn off autoplay

  5. Do the same as instruction 1 to 4 for Administrative Templates under User Configuration.
    6

    Do the same for administrative template under "User Configuration"

Written by: Dara Saoyuth

Written date: 23/02/2010

Video tutorial for this tip click here
9 easy steps for upgrading window 7 from beta to final release version

Today I’ve just finished upgrading my laptop operating system from beta version (pre-release version/Evaluation Copy) to window 7 Final Release.

Spending a few hours testing, I was succeeded in upgrading my window operating system without any error appear. By following the 9 easy steps below I believe that you will be able to do that on your own:

  1. You must have a window 7 setup software (usually in DVD) and then copy the whole DVD onto your local hard drive.

    Copy window 7 DVD into your hard drive

  2. Browse through the folder you’ve just copied to find the “source” folder. In the “source” folder search for the file “cversion.ini”.

    Search for folder "source"

    Search for file "cversion.ini"

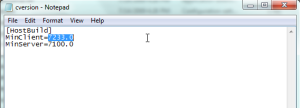
  3. Double click the “cversion.ini” file and then change the number as in the picture below (from 7233.0 to 7000.0):

    Change from 7233.0 to 7000.0

    Change from 7233.0 to 7000.0

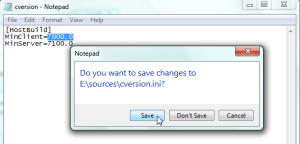
  4. Close the above notepad and save what you have changed.

    Save your change in Notepad

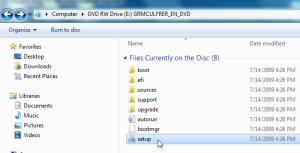
  5. Finally, you can now upgrading your new version of window 7 by just clicking the file “setup.exe” located in your window folder.

    Find file "setup.exe" in window 7 folder

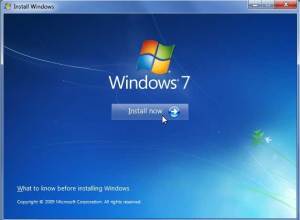
    When the new dialog box appear, just click Install now and wait until it finish.

    Click on "install now"

  6. Another dialog box will appear after you click install now. In this box click on Upgrade.

    Click upgrade

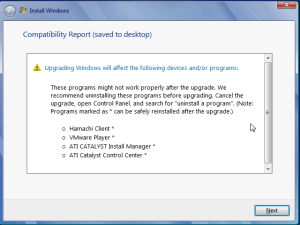
  7. Now, the system is checking all the programs in your previous version of window to know whether it support the new operating system or not. Wait a minute for this process and when it finish it’ll appear another dialog box. You would be happy if you can not find any program listed in this box because it means that all your programs in the previous window support with the new version of window. Otherwise, it’ll appear as below box:

    Dialoge box showing the unsupported programs

    If some of your programs are listed in the above box, please close that box and go to uninstall those program before you continue upgrading.

  8. When all of your programs support with the new version of window, you can now click next in the Compatibility Report (Save to desktop) box. (figure number 7)
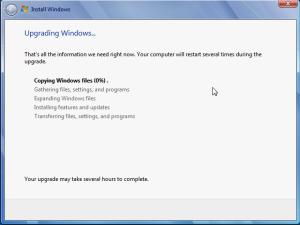
  9. After you press next, the system starts to upgrade the new operating system into your computer. This process take a bit long, so please wait and be patient.

    Your upgrade is in process

    Written date: 19/02/2010
    Written by: Dara Saoyuth